Track Manager
Import GPX routes, turn your own trail into a track, organise tracks in groups and display them on the map with your own colours, thickness and line styles.
What Is the Track Manager?
The Track Manager stores routes in GPX format (the standard GPS exchange format used by hiking apps, navigation devices and sports computers) and overlays them on the map as coloured lines. Open it from the side menu → Tracks.
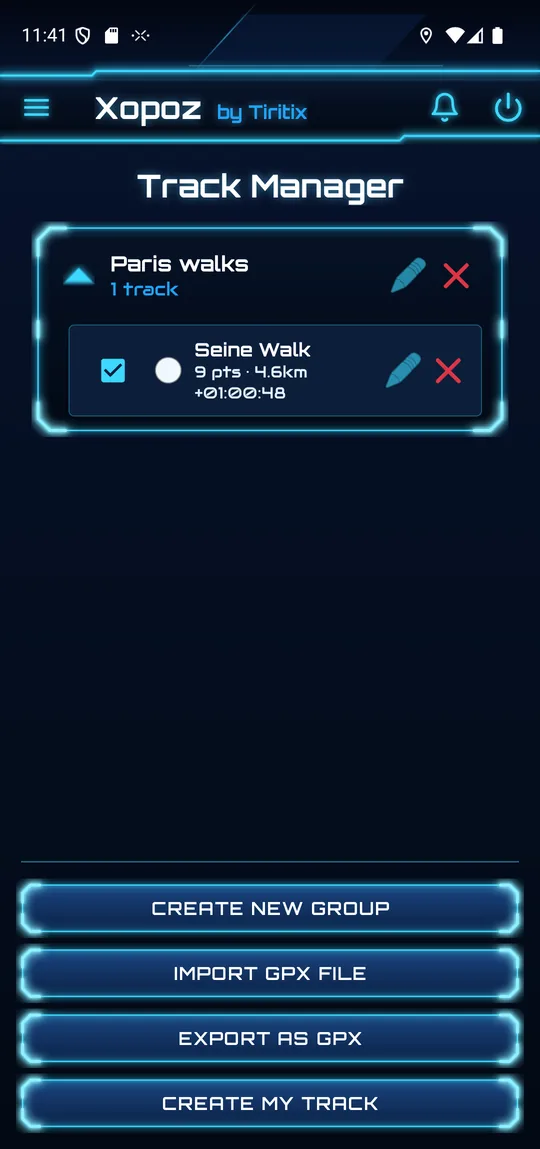
Four buttons at the bottom:
- Create New Group — add a group to organise tracks
- Import GPX File — import a route from a
.gpxfile - Export as GPX — save one of your tracks as a
.gpxfile - Create My Track — build a track from your own recorded positions
Track Groups
Tracks are organised into named groups. Each group header shows its name and number of tracks.
- Tap the arrow to expand / collapse the group
- Tap the pencil to rename the group
- Tap the red cross to delete the group and all its tracks
To create a group, tap Create New Group, type a name in the New Track Group dialog and tap Create. Runs recorded with the Run feature are saved automatically in a group called my Runs.
Importing a GPX File
- In the Track Manager, tap Import GPX File.
- The Import into group dialog asks which group receives the track — tap one.
- The Android file picker opens. Browse to your GPX file (for example in Downloads) and select it.
- Each track segment of the file becomes a separate track. Multi-segment files are named
TrackName_1,TrackName_2, etc. - Each imported track gets a colour from the app palette; you can change it afterwards.
Automatic Point Filtering
To keep the map fast, imported tracks are always simplified in two stages before being stored:
- 50 m distance filter: points closer than 50 m to the previous kept point are removed.
- Bearing cleanup: points that change direction by less than 5° are removed. Start, end and turning points are always kept.
Track Information
Each track row shows:
- A checkbox to show or hide the track on the map
- A colour dot with the track colour
- The name, the number of points kept and the total distance (e.g. 9 pts · 4.6km)
- The duration from start to end (e.g. +01:00:48) when the GPX file contains timestamps
- A pencil to edit the track and a red cross to delete it
Tap the track name to move the map so the whole track fits on screen.
Customising Track Appearance
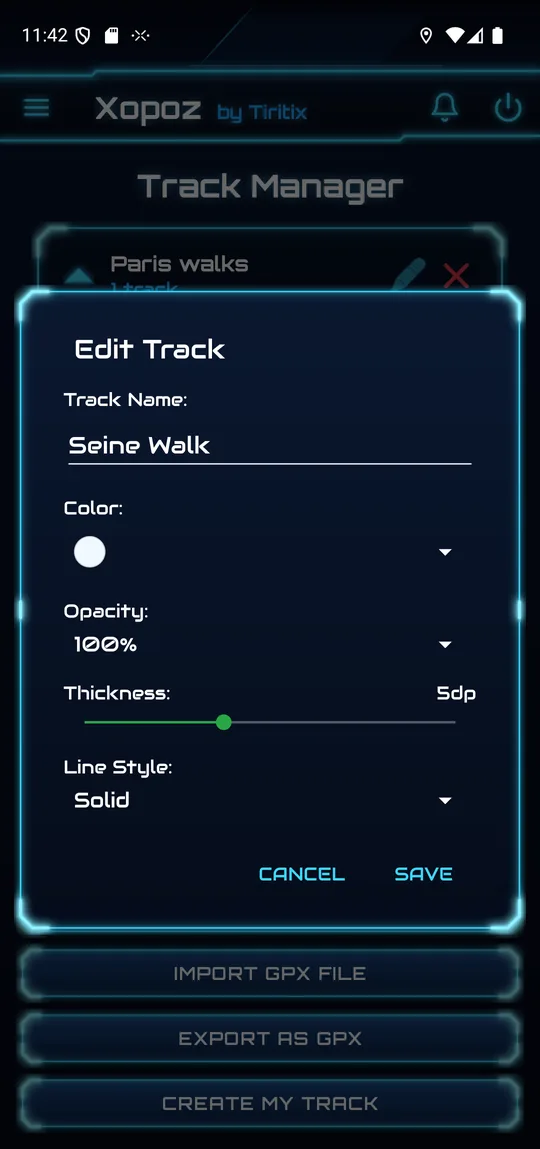
Tap the pencil on a track to open the Edit Track dialog:
| Setting | Options |
|---|---|
| Track Name | Free text |
| Color | Colours from the app palette |
| Opacity | 25% / 50% / 75% / 100% |
| Thickness | Slider, default 5 dp |
| Line Style | Solid / Dashed / Dotted |
Tap Save to apply or Cancel to discard.
Create My Track
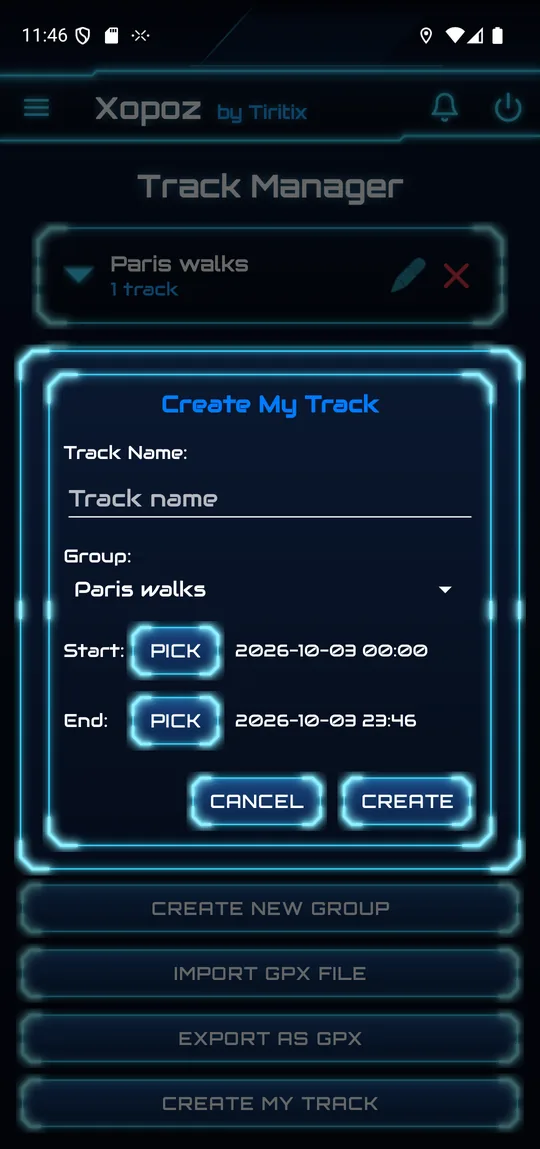
Turns a period of your own recorded positions into a permanent track — for example today's hike.
- Tap Create My Track.
- Enter a Track Name and choose the Group.
- Tap Pick next to Start and End to choose the time window. By default it covers today until now.
- Tap Create. Your positions in that window are filtered and saved as a track.
Your local position history must be enabled (Settings → Privacy Controls → Save my position locally). Very short periods that keep fewer than 10 points after filtering are not saved.
Exporting a Track
- Tap Export as GPX.
- In the Export Track dialog, choose the Group and then the Track.
- Tap Export and choose where to save the
.gpxfile.
Tracks on the Map
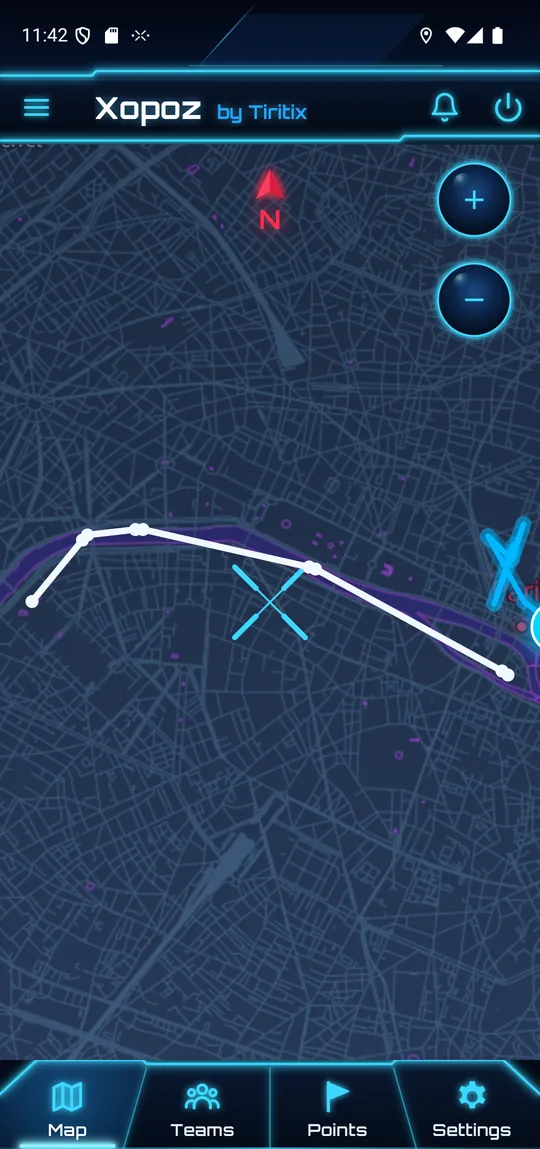
Visible tracks are drawn as coloured lines with a small marker on each kept point. Tap a marker to see the track name; if the GPX has timestamps, the time of that point is shown too.
Tracks are shown together with trails, so the Trail button on the map hides or shows them as well. A short Loading tracks… message may appear while large tracks are drawn.